HubSpot and GoToWebinar now have the option to integrate, but there are limits to what you can do with the native integration.
For example, let's say you want to use only your specially stylized HubSpot emails to correspond with webinar registrants. Well, the native integration lacks some essential tools for this.
With a few tricks and tools, however, you can get the control you want.
This post will guide you through the GoToWebinar and HubSpot integration and give you the tools to better customize your campaign.
- Basic Integration: Setting up the native integration between the two programs.
- HubSpot Landing Page Enrollment: Setting up HubSpot landing pages and forms that enroll users into GoToWebinar.
- Overriding GoToWebinar Emails: Stopping GoToWebinar’s default emails so you can control them through HubSpot.
- Extracting the Join Webinar URL: Using Zapier, we extract the unique URL that registrants use to join the webinar from GoToWebinar and send it to HubSpot.
- The HubSpot Registrant List: How to create a list in HubSpot that receives registrants and the Join URL from GoToWebinar
- Sending Custom Confirmation Emails: How to get theJoin Webinar URL in your emails.
Basic Integration
HubSpot offers some basic integration with GoToWebinar. I’ll show you a little later where this is incomplete, but it’s still important that we turn it on.
- Login to both HubSpot and GoToWebinar
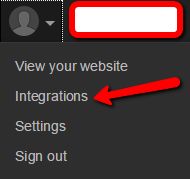
- In HubSpot, click on your image, and select “Integrations” from the dropdown.
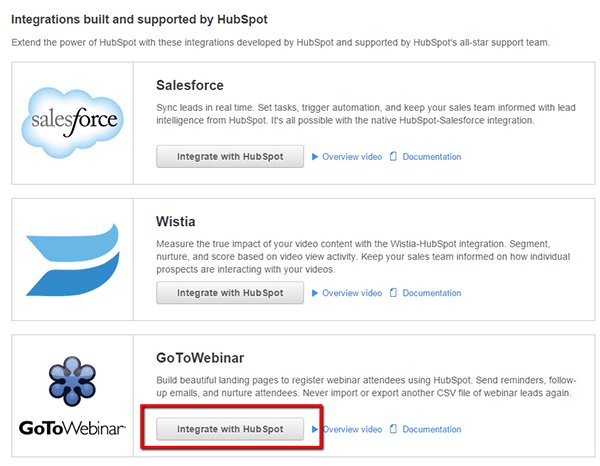
- You will see a list of programs that integrate with HubSpot. Find GoToWebinar and select “Integrate with HubSpot”.
- Now simply follow the prompts on both GoToWebinar and HubSpot.


This basic integration will give you shared access to the webinar lists and many other features.
HubSpot Landing Page Enrollment
Now let’s say you want to use your HubSpot landing page to enroll registrants rather than GoToWebinar’s landing pages.
That’s a pretty straight-forward task.
- Create a landing page, a form and a thank you page in HubSpot.
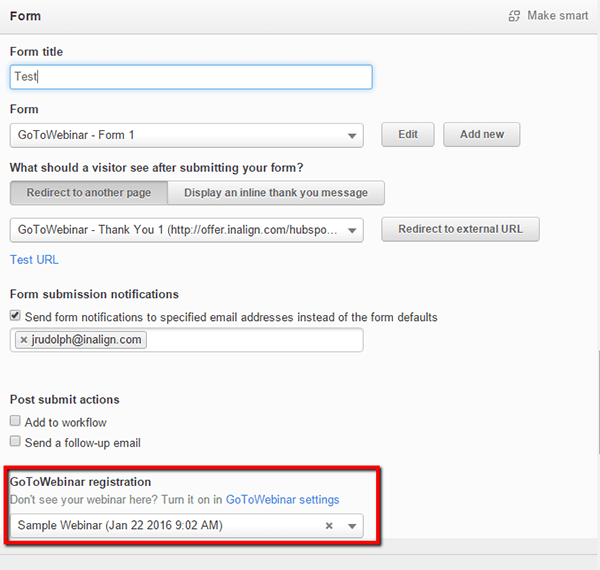
- In the landing page editing screen, scroll down to the form details.
- Select your desired form.
- Below that, you will see a new section called “GoToWebinar registration”. Find this and select the webinar you want your visitors to join when they fill out the form.

Now, when someone completes this form, they are automatically sent to GoToWebinar and added as a registrant.
Overriding GoToWebinar Emails
Now let’s say you want to send your own emails instead of the GoToWebinar ones. This task is fairly simple.
- Go into your GoToWebinar account
- Find the webinar you’re working on and select “Edit”

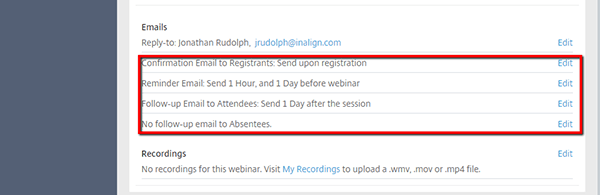
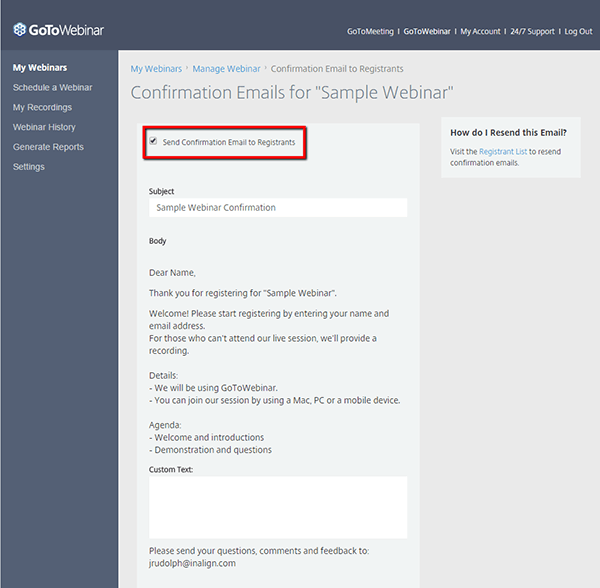
- Once you’re in the edit screen, scroll down to find the email section. Click on edit for “Confirmation email to registrants”
- Now uncheck “Send Confirmation Email to Registrants”
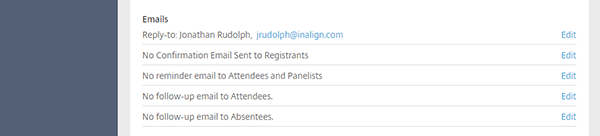
- Now you need to do the same for all the other email settings. When you’re finished, it should look like this:


All right. We have turned off GoToWebinar’s emails, so now we need to turn HubSpot’s on. Things are going to get tricky soon, so hold on tight.
Extracting the Join Webinar URL
So before you even create your confirmation email template, I will tell you where you’ll have a problem.
The “join webinar” link that is created by GoToWebinar and that is unique to each registrant. You cannot get this link from GoToWebinar to HubSpot with the current integration.
Without that link, no one can join your webinar when the time comes.
So now we turn to another tool, Zapier. We can use Zapier to send this URL from GoToWebinar to HubSpot.
First, we need to create a new property for contacts that we’ll associate with the Join Webinar URL.
- In your HubSpot Portal, click “Contacts” and select “Contact Settings” from the dropdown.
- In the left column, select “Contact Properties”
- Now select “Create New Property”

- Create a property for the URL
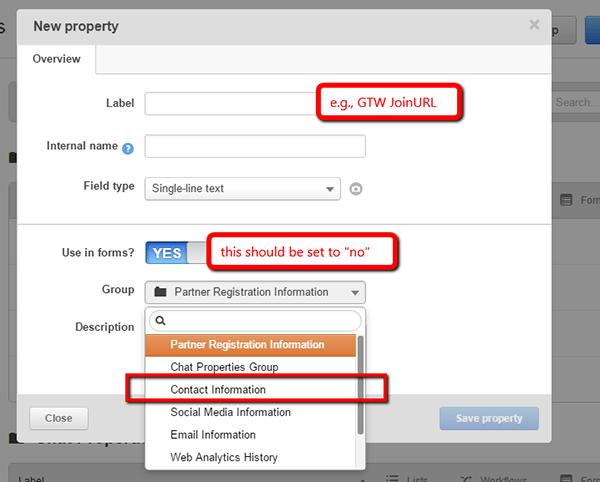
- Click save.


Now we will move into Zapier. This program allows us to get the URL data from GoToWebinar into the HubSpot property we just created.
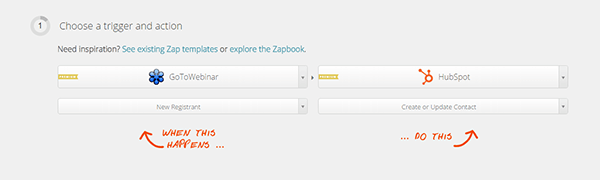
- Once in Zapier, create a new Zap.
- Make the following selections for your new Zap:
- You will be prompted to associate your GoToWebinar account with your HubSpot account. Follow the instructions—it’s pretty easy.
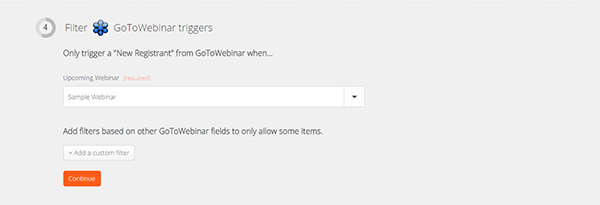
- Scroll down to the GoToWebinar trigger. The trigger will be your upcoming webinar. Select it from the list of available webinars.
- Scroll down to the match up section. Here you will see all the contact properties that are in your HubSpot account, including the Join Webinar URL one we created a short while ago.
- First you must select the Contact Email field. Click Insert Fields in the text box.
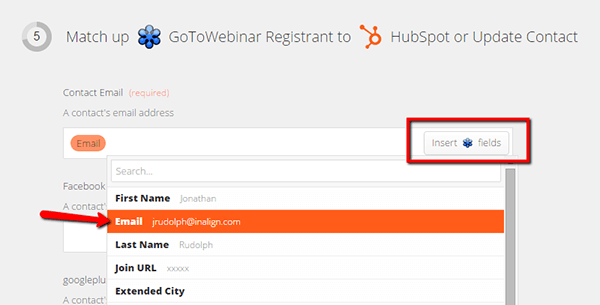 This tells Zapier that the “Contact Email” property from HubSpot should be aligned with the “Email” property in GoToWebinar. This is how it will determine unique entries.
 - The rest of the fields are optional. Basically, you just need to align GoToWebinar’s properties with HubSpot’s.
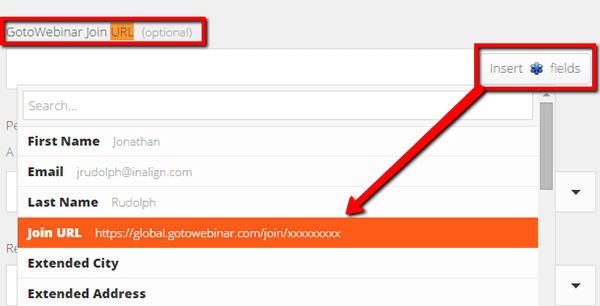
- Scroll down to the HubSpot URL property we created a few steps ago.
- Click “Insert Fields” in the textbox, then select the “Join URL” property.
- Save your Zap


 This tells Zapier that the “Contact Email” property from HubSpot should be aligned with the “Email” property in GoToWebinar. This is how it will determine unique entries.
Now when people are added to your webinar registrant list, Zapier will pull the Join URL from GoToWebinar and put it in the HubSpot contact information.
The HubSpot Registrant List
Now we’ll need to create list of registrants in HubSpot so you can send them emails.
- Click “Contacts” in the menu, and select “Lists” from the dropdown
- Create a new list
- This will be a smart list. Pull the first dropdown to read “Webinar”.

- Then, you’ll jump ahead to the last dropdown and select the webinar we’re promoting.


Now, a registrant will be added to this HubSpot list whenever they sign up for the webinar.
You can now use this list to create workflows to suit your campaign.
Sending Custom Confirmation Emails
For the last step, I’m just going to show you how to send your registrants their unique Join Webinar URL.
- Create or edit an email to send out to registrants.
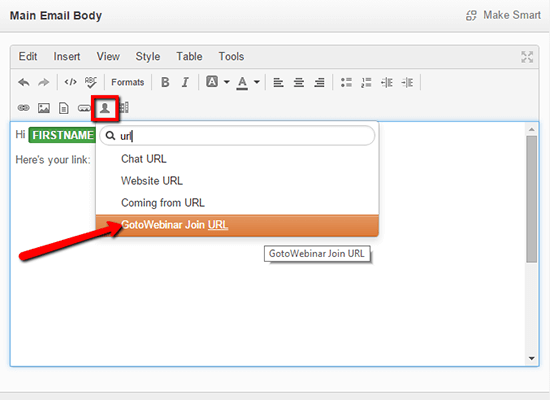
- In the main email body, you will just use HubSpot’s personalizations tool to add the URL.
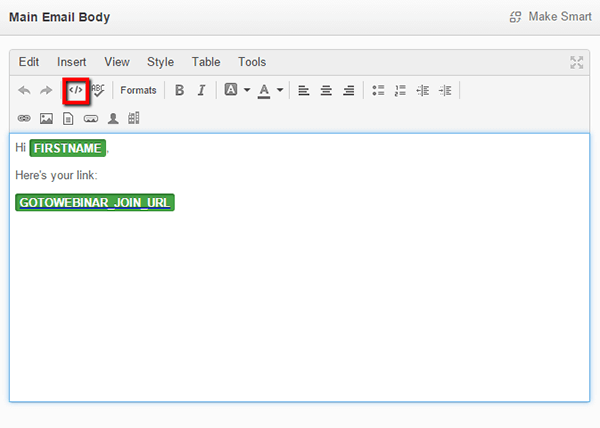
- This will now show the URL for the meeting, but not necessarily as a link (some email clients will convert it, some won’t), so you need to go into the source code. Click the “< />" button.
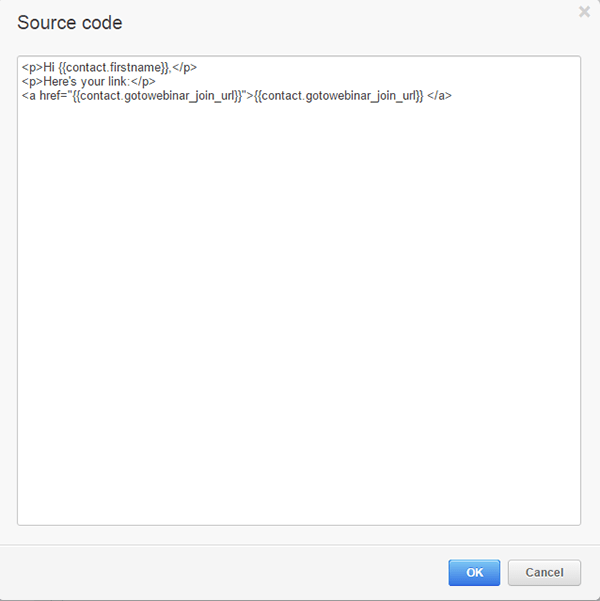
- You will see the code like this (remove the spaces between the curly brackets):
<p>{ {contact.gotowebinar_join_url} }</p><br>
- Simply change it to this (remove the spaces between the curly brackets):
<a href="{ {contact.gotowebinar_join_url} }">{ {contact.gotowebinar_join_url} } </a>
- Make sure it works by clicking “View preview as…” and selecting a contact who is signed up for the webinar.


Conclusion
That's all you need for complete control over your webinar campaigns. You can now fully customize your GoToWebinar marketing to better match your brand's style and strategy.